Pages

Showing posts with label freemotion quilting. Show all posts

Friday, May 10, 2013

Exhibition Struggles and Design Wall Weekend #6

This is being a tough month.  It's not like I didn't expect it... but here I am in the midst of it and I'm feeling a little in overwhelm.

First, as most of you know, I'm share the head of exhibitions for the Contemporary QuiltArt Association and we have our "Salsa!" exhibit opening Memorial day weekend.  Our jury met on April 28 at my home... you'd think that once the pieces were picked out, it should be smooth sailing, right?  Wrong.

One of the wonderful things about the venue we're going to be in, the Mighty Tieton Warehouse Gallery, is that they're going to print a catalog of the exhibit. So, as soon as I know the juror selections, I needed to get the photos of accepted pieces to their printer, which meant I had to download 114 photos (a full and detail shot of each piece) from the place where the artists had submitted them.  However, I soon found out that not every artist had sent high-resolution photos.  This meant I had to contact those artists who had sent low-res photos and help them get high resolution ones to me.  I even ended up taking photos for one artist!

Once the photos were sent over, I had to start working on compiling all the information for the catalog... artist's statements, sizes of artwork, materials and techniques used, photographer, price of piece, year completed, as well as artist and title of the piece.  We have 57 pieces in the show, so that's quite a bit of info to put together.

On Saturday, we pick up the pieces at our CQA meeting.  We're working on figuring out a way to best hang the works... the gallery has a wire hanging system.  At this point, we're planning on using a heavy-duty fishing line to attach the quilts and art cloth from the wire.  However, we will need to tie the fishing line onto all the hanging sticks and haven't fully worked out how we will adjust the length of the fishing line to make sure each piece is at the right level and even.  My husband and I have even gone to a couple hardware stores to try and see if there was some sort of hardware that we could put the line through and pull it and it would catch and not slip.  At this point, it looks like we're going to just be adjusting it by hand and tying it off.

On the 20th, we head over to Tieton (about a 2 and a half hour drive) to hang the show.  I'm not sure how long it will take considering the tying aspect.  Then our Opening will be on Saturday the 25th, so another long drive that day (I may stay overnight for that one since it goes from 12-5 and there is an artist celebratory dinner afterwards!)

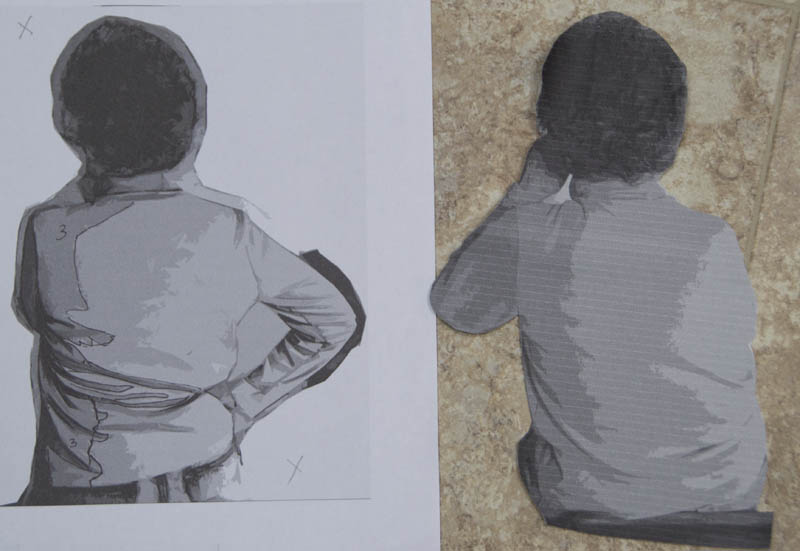
Oh, did I forget to mention that my two-year long program at the Gail Harker Center for the Creative Arts starts this month too?  I will be going up to La Conner from May 14-19 for my first class. We'll be meeting approximately every three months and have a good deal of homework in between each session.  However, as you can see from the photos here, Gail's student's create some amazing fiber artwork!

All this said, I've decided to back off of my initial goal this year to create a 5 x 7 piece each week.  I'm a little disappointed, but I am working on my artwork daily, so I suppose that's the real goal.  Since I'll be staying up at our cabin on Whidbey Island next week while I go to classes in La Conner, I plan to bring my freemotion quilting sampler quilt that I'm working on for Leah Day's Craftsy class to work on in the evening.  Having six days away from my husband and kids to just work on my art will be a real vacation!

Speaking of Leah's Craftsy class, she has just released "Freemotion Fillers Volume 2."  In celebration, if you go to her blog, you can click a link to get 50% off any of her three Craftsy classes (click here to get the page with the 50% off)!

OK, let's get going with Design Wall Weekend:

Design Wall Weekend #6 -- What do You Have on Your Design Wall?

What kind of blogs should link up?

I think that it's best to have content that matches the content and interests served with the blog that's hosting the party, so please only link up if your blog post is about any of the following:
  • Quilting and fabrics 
  • Fiber art of any kind
  • Hand & machine stitch or embroidery
  • Mixed media art
  • Book-making, art journals, and sketchbooks
  • Tutorials for any quilting, fiber, mixed media, sketchbook and other arts
  • These can be works in progress or finishes
Anna's hummingbird from my sketchbook - Acryllic paint, watercolor pencil, silver ink

Rules for the blog linking party

  • Mention Fiber Artist Journey in your post, either with a link or button-use the direct link to the specific post - not just your main blog website (this helps with your search engine position.)   If you have buttons on your sidebar that works great, please just at least mention something in your post, for example "I'm linking to Fiber Artist Journey, see my sidebar for their button."  If you need help on how to add your link, read this.
  • Please take the time to visit other links, everyone loves new visitors and comments!  Try to comment on at least two other blogs in the party.
If you would like to add a button to your blog you can copy the code which is below my buttons and add it as a gadget on the layout page of your blog. Here is a tutorial on how to do it.


Other Great Blogs to Link Up with and Check Out!

Nina Marie Sayre's Art Quilt Blog

Confessions of a Fabric Addict

Balzar Designs - Art Journal Every Day

Richard and Tanya Quilts

Quilt Matters

Sew Many Ways

Friday, April 19, 2013

Salsa Complete! and Design Wall Weekend #3

"Salsa" by Christina Fairley Erickson
Freehand Machine Embroidery, decorative stitching, freemotion quilting, trapunto
Fiber Art exhibit at the Schack Art Center
It's been a tough week.  Of course, completing my "Salsa" quilt and getting it entered in the Contemporary QuiltArt Association's (CQA) show (of the same name... Salsa), is a big achievement.  But perhaps it's a bit of a let-down too... I've put so much effort into this piece I'm not quite sure where to go from here.  I apologize for being offline this week- between taxes being due, having lots of work to get ready for the jury process for the Salsa show, and feeling a bit under the weather a couple days, I just didn't get much time at the computer.  I'll work at doing better over the next week.

"Pray for the Forest II" by Larkin J. Van Horn
Fabric, beads  $750.
I did get to a wonderful fiber art show of artists from the Whidbey Island branch of the Surface Design Association earlier this month at Schack Art Center in Everett.  Here are a couple of the wonderful pieces exhibited there.


"Compare and Contrast" by Liz Axford
3 layers silk organza- front and back layers
are screen-printed multiple times, hand-stitched
with cotton floss to reveal patterning $6500.


Design Wall Weekend #3 -- What do You Have on Your Design Wall?

What kind of blogs should link up?

I think that it's best to have content that matches the content and interests served with the blog that's hosting the party, so please only link up if your blog post is about any of the following:
  • Quilting and fabrics 
  • Fiber art of any kind
  • Hand & machine stitch or embroidery
  • Mixed media art
  • Book-making, art journals, and sketchbooks
  • Tutorials for any quilting, fiber, mixed media, sketchbook and other arts
  • These can be works in progress or finishes

Rules for the blog linking party

  • If you follow my blog, I'll follow yours!  PLEASE make sure to comment and tell me you're following, and I'll visit and  follow yours too.)
  • Please take the time to visit other links, everyone loves new visitors and comments!  Try to comment on at least two other blogs in the party.
If you would like to add a button to your blog you can copy the code which is below my buttons and add it as a gadget on the layout page of your blog. Here is a tutorial on how to do it.


You Might Also Be Interested in:


Tutorial- Sashing 
Pre-Quilted Blocks
True Triangles 
Video Tutorial
Fireworks Freemotion 
Quilting Design


Check Out These Other Great Blogs!

Nina Marie Sayre Art Quilts

Leah Day's Freemotion Quilting Project

Confessions of a Fabric Addict

Quilt Matters

Richard and Tanya Quilts

Friday, April 12, 2013

Freemotion Quilting Sampler & Design Wall Weekend #2

Salsa quilt with "Here Comes the Sun"
freemotion quilting design
My Salsa quilt is almost finished... I only have 3 sides of the sashing/border to quilt and the binding to go... good thing since the show deadline is tomorrow!  After trying several different styles of freemotion quilting for the sashing (as well as thread color), I decided to let the fabric be my guide and created what I'm calling the "Here Comes the Sun" freemotion quilting design.  I'll work on getting a tutorial out on this design later this week.
Closeup of the sashing fabric
which inspired the design


Layout of my quilt-top for a free-motion quilting sampler
that I currently have on my design wall


I've also finally got started on piecing my quilt top together that I'll be using for a freemotion quilting sampler.  I'm enrolled in Leah Day's Craftsy class "Freemotion Fillers Volume 1" which teaches 50 different freemotion quilting designs (49 blocks each with their own design and 1 design throughout the sashing and border.)  I'm thinking, however, of substituting some of the designs that Leah teaches in the class with some of my own, such as my True Triangles design.  Make sure to check out the True Triangles Video Tutorial here!


So, what do you have on your design wall?   By the way, if you don't yet have your own design wall, click here for a great tutorial on how to make one for yourself from Quilts by Jen.   I'm looking forward to seeing all sorts of inspiring blogs for our  blog party link up!


What kind of blogs should link up?

I think that it's best to have content that matches the content and interests served with the blog that's hosting the party, so please only link up if your blog post is about any of the following:
  • Quilting and fabrics 
  • Fiber art of any kind
  • Hand & machine stitch or embroidery
  • Mixed media art
  • Book-making, art journals, and sketchbooks
  • Tutorials for any quilting, fiber, mixed media, sketchbook and other arts
  • These can be works in progress or finishes

Rules for the blog linking party

  • If you follow my blog, I'll follow yours!  PLEASE make sure to comment and tell me you're following, and I'll visit and  follow yours too.)
  • Please take the time to visit other links, everyone loves new visitors and comments!  Try to comment on at least two other blogs in the party.
If you would like to add a button to your blog you can copy the code which is below my buttons and add it as a gadget on the layout page of your blog. Here is a tutorial on how to do it.


You Might Also Be Interested in:


Tutorial- Sashing 
Pre-Quilted Blocks
True Triangles 
Video Tutorial
Fireworks Freemotion Quilting Design


Check Out These Other Great Blogs!

Nina Marie Sayre Art Quilts

Leah Day's Freemotion Quilting Project

Confessions of a Fabric Addict

Quilt Matters

Richard and Tanya Quilts


Sunday, April 7, 2013

True Triangles - Video Tutorial

Working on sample of True Triangles
I've had some wonderful comments on my Salsa blocks, as well as a few questions on how I did certain aspects, including my background of my most recent block, Chili Pepper.  Today, I'm going to go over the triangles freemotion quilting design. 


Practice and notes from my sketchbook - True Triangles


I started working out this triangle design in my sketchbook, because I wanted a way to have triangles, but not a bunch of connecting lines or other angles.
More notes from my sketchbook
The main trick with this design is to make your first triangle and then backtrack (or "travel stitch" as Leah Day of the Freemotion Quilting Project calls it) to the middle of one of the sides of your triangle, where you start the first corner of your next triangle.

Difficulty: Beginner- The main difficulty with this design is in getting your sides of your triangles straight and in carefully backtracking, so your stitches stay on the line of the original triangle's line.

OK, I'm still working out the bugs on how to do a nice job on videography for my tutorials, so bear with me.  I cut down time on this video by speeding it up a bit during part of the sewing, but I need a bit more practice on my hand position while videoing and also adding audio to the part which has increased speed.

Click Here if the Video isn't Showing Above

True Triangles used in the background of my Chili Pepper block
If you haven't linked up yet, make sure to visit Design Wall Weekend!  Or just stop by to find some other great blogs!

You Might Also Be Interested In:

Design Wall Weekend #1 Tutorial: Adding Your
Link to a Blog Party
Design Wall Weekends


I'm Linking up with:

Freemotion by the River

Quilt Story

Thursday, April 4, 2013

How to Use Your Design Wall

Years back, I never used a design wall.  I might sketch out a design on graph paper or in my sketchbook, but then I pretty much just went with it and constructed as close to what I'd drawn as I could.  It certainly is possible to get a good result from that... but it's kind of hit or miss.  It's much more effective to use a design wall.

Your design wall can simply be a piece of batting that you pin up on a wall anywhere you have some space to step back from it (preferably at least 8-12 feet or 3-4 meters) and be able to look at your design as it progresses.


First try- lower left seems a bit heavy with the
dark backgrounds
The change for me came when I started taking a Design series - classes for quilters that taught you the basic fundamentals of design.  Our teacher always said "Make visual decisions Visually."  In other words, you have to actually look at something to see if it's going to work, rather than just thinking it will work.

Tonight it was time to put my Salsa blocks all together.  So, up they went on the design wall.  I arranged them, then stepped back and took a look (and a picture).

I then rearranged them several times, each time checking to see how I liked the arrangement.
I like having the two red backgrounds on opposite corners

Looking through a reducing glass or at a photograph can also help you get a sense of how well the design will work from afar.

After determining the placement of the blocks, I then had to decide which fabic I was going to use for the sashing.  To do this, I pinned different pieces of fabric up and put the blocks on top, stepped back and looked at the overall effect.

The green fabric to the right is bold and seemed like a good prospect, but when I tried out the black with red/yellow/orange batik, I think I found a winner!
Salsa blocks with sashing complete
Next step will adding batting/backing and freemotion quilting of the sashing.

Make sure to check back this weekend for our first Design Wall Weekend Blog Link-up Party!


You Might Also Be Interested In:

Tutorial: Add a Button 
on Your Blog
Tutorial: Adding Your
Link to a Blog Party
Design Wall Weekends


One of the best places to learn FreeMotion Quilting: Leah Day's FreeMotion Quilting Project

Monday, April 1, 2013

Red Hot Chili Peppers!

"Chili Pepper" by Christina Fairley Erickson
Freehand machine embroidery with decorative stitching and freemotion quilting
Make sure to check out the start of my Design Wall Weekends Blog Link Party coming Saturday April 6!

Well, I finally finished up my final 5 x 7" block for the Salsa Quilt.  I had some fun with this and will be posting a couple of tutorials later this week for both how to do unusual lettering and a new freemotion quilting design.  I also will work on documenting my process for installing new fonts onto your computer, so you can play around with different lettering styles like this "Taco Modern" font I use in each of my salsa blocks.

I've been super busy this last week catching up after being gone for 5 days in the "Experimental Hand Stitch class."  I've been working on continuing to complete my hand-stitch samples, which are quite relaxing to do.  I've also started cutting and piecing a new practice quilt, which I'm doing along with Leah Day's Craftsy class.  Although I'm pretty comfortable with freemotion machine quilting, the more you practice, the better you get.  The one thing I haven't completely decided upon is whether I'm going to do all the fillers which Leah suggests in her class, or whether I'll pick and choose those which I want to do.  I'm not 100% thrilled with every design she's picked, so I may just substitute some of my own, or others I've learned from Leah's blog.

One thing that's going to be a little different in the future is that I will be hosting a "Design Wall Weekend" blog linking party.  This will be open to quilters, fiber artists, mixed media artists, and book/art journalists who have blogs to help increase exposure to all sorts of great ideas.

Now, it's on to do the sashing and binding for this quilt.  Not to mention, I will need to get going on a new 5 x 7 Challenge piece for next week!  So check back for tutorials later this week and I hope you will have some fun quilting this week.

You Might Also Be Interested in:

And the Winner Is... A Slice of Lime Peppers and Avocado


Check out these other great blogs:

Freshly Pieced

Freemotion by the River

Quilt Story


Thursday, March 28, 2013

Waiting- the Fiber Funster's Challenge

Waiting by Charo Lopez
My small art-quilt group, the Fiber Funsters, met yesterday with our every-other month challenge.  We take turns choosing a theme.  This time, Charo picked "Waiting" for us to interpret.  Charo's piece, left, features her cat gazing out the window at little birds and bugs made from beads, buttons, and embroidery.  The pillow her kitty sits on is puffy and with little braid and tassels.


Allison Chang's "Waiting" (work in progress)
Allison started with white fabric and she wrote "Waiting" in Chinese characters across it.  She then fused shapes in a metallic gold, red, green, and black.  The squares and plaids contrasted with the circles, spirals, and dramatic red diagonal slashes made for active composition.  She also has put three half spheres of beaded wool felted roving.


Carolyn Hitter posed for several photos for her quilt
Carolyn started with having her husband, Jim, take some photos of her contemplating something from behind.  Using a method she learned in Leni Levenson Wiener's "Photo-Inspired Art Quilts: From Composition to Finished Piece", Carolyn took the photos and applied a Cutout Filter in Adobe Photoshop Elements.  She then chose the photo she liked the best (on the far left) and traced the shapes (below.)  The background of Carolyn's quilt is made from a fuzzy interfacing... just like on a design wall!  Her title says it all: "Waiting for Inspiration"
"Waiting for Inspiration" by Carolyn Hitter


Any of us who are mothers can relate to the sense of waiting that goes along with pregnancy.  Waiting to get pregnant, to find out whether you'll have a son or a daughter, to make sure they're healthy, and finally for the wonderous day when you meet your child.  Lise's humourous spin on these aspects of pregnancy is whimsical with the pink (for girls) and blue (for boys) background that the pollywog shaped sperm are swimming through.  
"Waiting" by Lise Vandandaigue
Similarly, Debbie has a beautiful pair of thread-painted birds waiting over their nest filled with three eggs.  The background has a very delicate soft changes of color with light blue and lavender squares pieced by fusing.  


My piece is still a work-in-progress.  After missing a flight out of Paris one year, I had to wait for 9 hours for the next flight.  Pretty tough when you're by yourself and already time-lagged.  Of course, it's nothing compared to those who have been stuck in an airport for days due to whether or other problems... my heart always goes out to them.  I'm adding freemotion quilting for shading will continue for background 
"Waiting" by Christina Fairley Erickson (work in progress)
 You Might Also Be Interested in:

Fiber Funster's Group 
Reveal- Celebration
"Opening" - The
Fiber Funsters
The Fiber Funsters 
Group Challenge


Here's some other great blogs to check out:

Leah Day's FreeMotion Quilting Project

Confessions of a Fabric Addict

Nina Marie Sayre's Art Quilt Blog

Never to Hot to Stitch

Monday, March 18, 2013

And the Winner is...

"Corn" by Christina Fairley Erickson
Machine Freehand Embroidery, decorative stitching, freemotion quilting
Red!  Thanks for all the comments, encouragement and opinions on the background for my corn piece.  The little ends of the corn husk were challenging to applique down, but you can see a bit of the organza husk standing up in the picture.  What you can't really tell from the photo is how much the trapunto stands out.  The two longer corn rows have 5 extra layers of batting, making them stand about 3/4" up from the backing. I cut each of the batting layers a little smaller than the last, so it really has a rounded look.  The lower ear of corn has less trapunto (3 layers), since it is behind the others.


I'm now working on my last piece, chili peppers.  I started with the green stems, then went on to the darker shadowed portions of the chili.

The difficult part of these is that they are so thin, it will be difficult to convey a 3-D effect or to trapunto them.  So I tried to sew both in the long/horizontal direction and also around the width of each chili, to convey the roundness of each.

One of the main things when doing thread painting is to keep on layering your colors to add more dimension and gradation.  If you just fill in one color butted up to the next, it will look flat and like a paint-by-number painting.  Blending the colors is very important.  Also, look for the unexpected colors.  In this chili, I found a small place where the shadow had just a touch of lavender... it adds a lot to the finished piece to have those little bits that your eye might not originally catch.

Finished "Chili" thread painting
Now I just need to do the background and then I'll be on to putting all 9 of my Salsa blocks together!


You Might Also Be Interested in:

Corn - Red or Orange- 
You Vote!
Piquant Progress Fitting My Challenge 
with Showing


Please check out these other great blogs:

FreeMotion by the River by Connie Kresin

Quilt Story