When you find a button that you'd like to add that has the code included underneath the button, copy the code (highlight it and click Control-C or Command-C.) You can use my "Design Wall Weekend" button on the right.
Your layout (below) can be modified in the Template Designer, but at this point, let's focus on adding the button. Look over your existing layout. You should see several "Add a Gadget" links. Choose where on your page you'd like to have the button and click the "Add a Gadget" link.
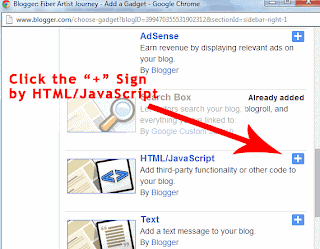
A new window with a list of options (gadgets) that you can add to your blog appears. Scroll down the list until you get to the HTML/Javascript option and click it.
Now you just need to name your button and paste in the code which you have copied for the button:
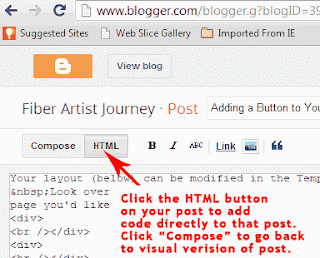
If you don't want the button to show up on all your posts, you can just add the code in to your post. To do this, click the HTML button at the top of the screen where you are writing your post. Determine where you want the button and Paste the code into the HTML. Then, click the "Compose" button to return to the visual version of creating your post.
You Might Also Be Interested In:
 |
 |
|
| How to Post a Link for a Blog Link Party |
Developing the Creative Habit |
Designing for a Theme- Innovation Part 2 |


O.M.G.!!! Thank you, thank you! I could never figure out how to add a button to my blog and here you have a fantastic tutorial. I think I love you!
ReplyDeleteI'm glad this is helpful. I'm working on more tutorials, so check back. And make sure to link up on Saturday for Desighn Wall Weekend!
Delete