Pages

Showing posts with label embroidery. Show all posts

Monday, March 25, 2013

Five Days of Stitch Heaven

Christina standing below hand-dyed
embroidery threads
I'm back from five days in "stitch heaven" with Gail Harker.  The class, "Experimental Hand Stitch" focuses on Procion MX dyeing of embroidery thread and a wool/acrylic felt to stitch on, and then learning some of the basic embroidery stitches and how to use them in a contemporary context.

My friends", Debbie and Rebecca, dyed felts and threads


The felt and threads are vibrant and beautiful.  Gail feels that having your materials inspire you is important, so she helps her students understand their color choices and combinations to be successful with the dyeing process.

Some of my dyed felts and threads
I basically stuck with an analogous color scheme from yellow-green through red-violet.  If you're unfamiliar with analogous color schemes, it means that you pick colors that are adjacent to each other on the color wheel.  So the colors I worked with were greens, blues, and violets.

After our dyeing days, we started doing small stitch samplers.  Each stitch will have its own page in a small stitch book (we even learned how to bind our books!)  We also worked on documenting our samples within a sketchbook, including what threads we used, any observations we have, needles that were chosen, etc.

Thursday, March 21, 2013

More Procion MX Dyeing

Wow... another fantastic day of mostly working with Procion MX dyeing at the Gail Harker Center for Creative Studies.  To be completely honest, I'm pretty tired... this can be hard work.  So, I'm going to keep it short and sweet tonight, and just put up some images and descriptions of the processes and projects we worked on.

First, our hand-dyed embroidery threads are totally luscious!  Here they are drying in our classroom.  We had to rinse them out and then set the color in hot water with Synthropol today.

We then started dyeing wool-rayon felt, which we'd cut into pieces prior to class, and will be making into hand-stitched books.

Felt with dye poured on (wet)
The felt totally soaks up the dye... you have to pour it on and it looks horrible and dark for the most part.

Rinsing out the felt
After allowing it to sit for a few hours, we rinsed it out and also set the dye with Synthropol.  Since the felt soaks up so much water, we had to carefully wrap it in towels to help dry it.  You don't want to press or agitate it very much, or it starts the felting process.  We then left it to completely dry overnight.

Felt dyeing


Rinsed felt for hand-made stitch books, laid out to dry


We also worked with painting dyes on sketchbook pages.  We do these in 2-page "spreads" so that they will go together when the book is opened.  We then fuse pages together, to make the pages stiff and able to be stitched on.  We started working on a few pages by drawing a design on them, then punching holes through the paper with a darning needle.  We then can easily put our stitches through the holes.


Some sketchbook pages painted with dye
I believe we're done with the dyeing now... on to more stitchwork tomorrow!


A two-page spread for a sketchbook, painted with Procion MX dye
  You Might Also Be Interested in:


New 5 x 7 
Challenge Pieces
Complex Threads 2 Developing the 
Creative Habit

Check out these other Great Blogs!
For great ideas on freemotion quilting, check out Leah Day's FreeMotion Quilting Project

Wednesday, March 20, 2013

Dyeing to Embroider

I spent the day literally dyeing to embroider... yes, I am anxiously awaiting getting down to stitching, but I mean "dyeing" with an "e" in it.  Rather than using all commercially available embroidery floss, we spent the day making our own threads, for the first of 5 days in "Experimental Hand Stitch" at the Gail Harker Center for the Creative Arts in LaConner, WA.  I've always salivated at the yummy colors of hand-dyed threads.  Now I know how to make them!

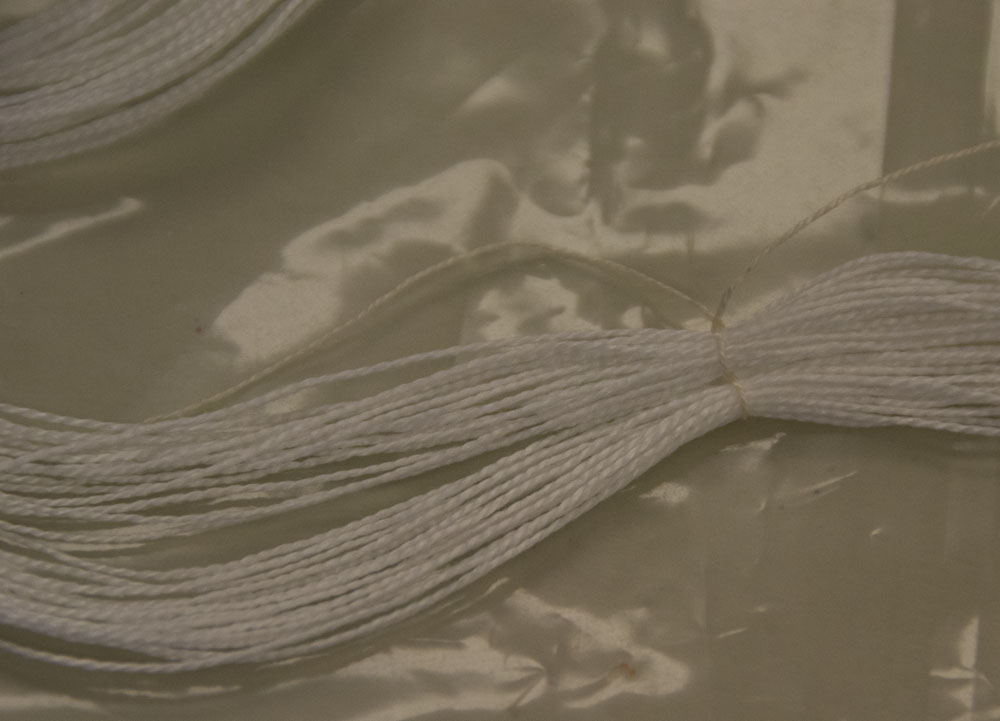
First, we had to prepare the skeins of thread.  There are two main types of embroidery thread, pearl (or perle in French) cotton which is a twisted cotton and cotton floss (also known as 6-stranded cotton.)  Pearl cotton comes in many different thicknesses: 3, 5, 8, 12, and 16, with 3 being the thickest and 16 being quite delicate.  Six-stranded cotton is literally that, 6 strands that you can separate, depending upon how thick a piece you want for your project.  Of course there are many other types of threads or yarns you can use for embroidery and any natural fiber will work for dyeing (silk, rayon, bamboo, etc.)  We have several unusual yarns and threads as well as the pearl cotton and cotton floss.

To prepare for dyeing, we had to get the thread into skeins (some of it came on balls or rolls that we had to wind into a skein) and then tie the skeins about every 12 inches (30 cm), to make sure it wouldn't get tangled up.  We used a figure 8 tie with a square knot, tight enough to hold the skein in place, but not so tight that it would cause a resist and have the thread not take up the dye underneath the tie.

As with any Procion MX dyeing, we then soaked our threads in a soda ash solution, so that the chemical bond would occur in the fiber when the dye  is introduced.

The next step was to use a syringe to "paint" the colors on the thread.  As you inject the dye onto the thread, you then need to smoosh it down to ensure that it is completely saturated, particularly wherever the ties are.    I chose to mainly go with an analogous color scheme from yellow-green, to green, to blue-green, to blue, to blue-violet, to violet.  With sticking to one color scheme, I can be assured that my projects using these dyed threads will go together.


When all the dye is on the threads, you carefully roll the threads up in plastic (see red arrow) and then leave it overnight to process.  I can't wait to see them in the morning!

My Mom, Nan Lopis, working
on her dyed threads
The best thing of all... my Mom has joined me for the 5 day class at Gail Harker's!  I was concerned that the dyeing might not be something she'd enjoy (she'll love the hand-stitching), but she came through like a champ, and made a lovely yellow-olive-greens colorway of threads.

Note: all the threads in the photos above have wet dye on them.  The colors will change somewhat upon the dye setting and washing them afterwards.  One of my favorite parts of dyeing is when you unwrap it the next day and wash it out... it's like getting a present!


You Might Also Be Interested in:

Making Fabric More Embroidery Samples How to Make a 
Knotted Blanket Stitch 
Video Tutorial

Sunday, January 6, 2013

Hand Stitch Variations

I've been continuing to explore hand-stitch this last week and completed another sampler.  I'm not really sure where I'm going to be using this in my work this year, I'm just certain that I am.  I've seen so many spectacular pieces that were enhanced by using hand-stitch.   I've also noticed that show judges seem to appreciate the extra effort that an artist has put in, when there are hand-stitch elements.  Here are the stitches (on acrylic felt- not hooped):

Top row:

  1. Double Knot Stitch (aka Old English knot, Palestrina or Smyrna Stitch)
  2. Cable Chain Stitch.  This is like chain stitch, but with a link in between the chains
  3. Fern Stitch (aka Fern Leaf Stitch)
  4. Paris Stitch (aka Open Square Stitch)
  5. Fence Stitch (aka Bosnian Stitch)
  6. Tnorn Stitch
  7. Cross Stitch (aka Berlin or Sampler Stitch)
  8. Braid Stitch
  9. Singalese Chain
  10. Wheatear Stitch
  11. Fishbone Stitch (on leaves)

Bottom row:
  1. Whipped Backstitch
  2. Threaded Backstitch
  3. Double Threaded Backstitch
  4. Chain Stitch with Backstitch running through center
  5. Double Knot Stitch
  6. Petal Stitch
  7. Scroll Stitch
  8. Ladder Stitch
  9. Long Armed Cross Stitch
  10. Vandyck Stitch (aka Flat Variable Stitch)
  11. Long & Short Stitch (top leaf in oranges)
  12. Stem Filling Stitch (bottom leaf in blues)

I'm partially doing this work as I'm taking another hand-stitch course at the Gail Harker Center for Creative Arts in March.  I'm looking forward to getting more ideas in how to incorporate the hand stitches into my work.

Speaking of Gail's classes, this Thursday, Jan 10 from 5-8 pm, the opening of "Complex Threads: Students of Gail Harker Center for Creative Arts" will be happening at the Schack Art Center in Everett WA.  If in the area, be sure to check it out!

You might also be interested in:
How to make a knotted blanket stitch (video)
More embroidery samples
Stitchwork Samplers

Monday, December 24, 2012

Snowflake Lane & How to Make a Knotted Blanket Stitch

Christina  in Winter White Cape
at Snowflake Lane
Randy and I finished up our shopping at Bellevue Square where they have "Snowflake Lane" each night during the holidays. He's now entertaining us playing an assortment of Christmas music, Broadway show tunes, and pieces from the 20's to the 50's. I'm at a distinct disadvantage with "Name That Tune" for that era, since I wasn't even born yet, but my Mom is having a great time!
Snowflake Lane

Knotted Blanket Stitch
Since I always like to keep my hands busy, I'm working on an edging stitch for one of my embroidery samplers. I decided to do a Knotted Blanket Stitch, which I'll show  how to do here:


Step 1- Make a loop
Step 2 - Needle through loop and
above the lower thread from last stitch


Step 3- Pull loop tight around needle
Step 4 - Pull thread through, making
sure that loop stays tight to form knot

You might also be interested in:
Stitchwork Samplers
More Embroidery Samples


Merry Christmas from our family to yours and wishing us all Peace on Earth.

Christina


Thursday, December 20, 2012

More embroidery samples

I've spent some evenings working more on hand embroidery.  Let me know if you want instructions or thread types on any of the stitches!

Top Row:

  1. Herringbone stitch
  2. Herringbone stitch
  3. Cretan stitch - similar to herringbone, but with a twist
  4. Cable stitch
  5. Laced running stitch - simple but looks nice!
  6. Pekinese stitch - while this isn't very difficult, you need to work at keeping loops the same size
  7. Laid trailing stitch - very thick raised couched cording
  8. Feather stitch
  9. Heavy Chain stitch- this is almost a braided stitch
  10. Twisted Chain stitch
  11. Chevron stitch
  12. Open chain stitch -this fine wool (DMC Medicis) is a bit tough to see- looks like a ladder

Bottom Row:
  1. Double Chain stitch
  2. Feathered Chain stitch - nice vine-like look
  3. Crested Chain stitch
  4. Top: Rosette Chain stitch  Bottom: Buttonhole Wheel
  5. Two Color Chain stitch - this is done with two threads in your needle, but just catching one each stitch
  6. Rope stitch
  7. Raised Stem stitch
  8. Blanket stitch
  9. Whipped Blanket stitch
  10. Long & Short Blanket stitch
  11. Closed Blanket stitch
  12. Up & Down Blanket stitch - make a nice little knot along with two strands to side

You might also be interested in:
Stitchwork Samplers
Snowflake Lane and How to make a Knotted Blanket Stitch (with video!)

Thursday, December 13, 2012

Defining Myself

While I currently define myself as a "fiber and mixed media artist", I struggle with the definition. I started early on as a seamstress,then as a costume designer. I moved to being a quilter for a short while, then specialized in art quilts. I've played around with many styles, but basically feel my niche is in representational art.

When I started falling in love with making my own fabric, I became a surface designer.  But, I was still pretty wrapped up in using my fabrics in my quilts.  Now, I'm moving even more to embroidery.  Whether it's dense machine embroidery, thread painting, intricate machine quilting, or hand work, stitch seems to give me a tactile grounding that no other medium has for me.  But how do I define myself?  Where does this work fit in?

I know that most shows that are quilt-centered are very strict about their definition of a quilt... 3 layers connected with stitch, often needing to be professionally bound in some way.  If I decide to create a stitched piece and stretch it over a frame or canvas, then it won't qualify.  So the question is, how important is it to me to fit into the categories that show producers have come up with?  Or even, how important is it to me to continue to exhibit?  Is it more important to create and then find the right niche for my creations, rather than creating to fit particular guidelines?

While I don't feel like I have a strong enough discernible style or large enough body of work to go into solo shows, I do enjoy having my work out in front of the public.  The question is, will work that is not formally a "quilt" get accepted into shows?  Do I feel I need to break out of confines of being defined as a quilter?

I don't know that I have the answer for that yet.  Maybe as I work out my goals for the upcoming year, it will become more clear to me.  How do you define yourself?  I'd love to hear your thoughts!

Quick tip for productivity:  I recently found the iPhone app "Evernote".  This is a way to organize all your notes, including Word docs, Adobe Acrobat PDFs, and simple text inputs.  You can also use it online or download a version to your computer, as well.  They all sync together. You can organize notes into notebooks (so I have one notebook for my studio, one for family, one for my blog, etc.) and put as many items within each notebook as you want.  It's a great tool!


Wednesday, December 12, 2012

Stitch-work Samplers


Two blissful days of studying and practicing Elizabethan Embroidery... seems a little self-indulgent when I'm not prepared for the upcoming holidays, but wonderful nonetheless.  Our instructors, Gail Harker and Penny Peters were wonderful and the class was both intense, yet relaxing.  It may not seem like much, but here is my sampler of some of the types of stitches used in Elizabethan Embroidery:

Top row (from left to right)
Pearl Stitch (2 thicknesses of threads)
Fly Stitch
Stem Stitch with French knots
Satin Stitch leaf with back stitch outlining and vein
Laid-work grid with diagonal couching (a couched filling)
A Plaited Braid Stitch (in heavy wool yarn)

On the bottom row (left to right)
Running Stitch
Back Stitch
Couching
Split Stitch
Stem Stitch (loops)
Slanted Buttonhole Stitch
Chain Stitch
Knotted Stitch
Plaited Braid Stitch (in gold-wrapped thread)
Plaited Braid Stitch (in purple metallic glitterati)
We also did some needle-lace (not pictured.)        

Here is a close up of a few (I especially like the goldwork!):
This goldwork sampler was made by Penny Peters,
one of our teachers:
Here is another sample by Penny of laid-work:

You might also be interested in:
More Embroidery Samples
Snowflake Lane & How to Make a Knotted Blanket Stitch (with video!)


Tuesday, December 11, 2012

Day 1- Immersed in Splendor

Queen Elizabeth 1 in stunningly embroidered
dress
We started the Elizabethan embroidery class today with a slide show of incredible examples both from paintings and surviving pieces of embroidery.  Of course, fashion followed the monarch herself.  Her intricately embroidered dresses were masterworks and sometimes were so heavily jeweled that she would have to be carried, rather than walking.  In this picture to the right, the embroidery depicts all sorts of wildlife, some quite realistic and others from imagination.
Botanical & natural themes in Elizabethan gold work

Themes for embroidery during the 16th century generally tended to coincide with what people knew: botanical and animal life.  In this piece of gold-work (where the thread is wrapped with pure gold), undulating vines with leaves, flowers, caterpillars  moths, and other bugs are depicted.   However, Queen Elizabeth had a penchant for being one of a kind (she even had laws against others being able to wear things as grandiose as hers... like the size of their neck ruffs!)
"I always feel like somebody's watching me..."
In this painting, the embroidery design covering her dress is of eyes and ears, to imply that she could see and hear all and was omniscient over her subjects.  Wouldn't that strike terror into the hearts of her court, servants, and the general populace!


On the left sleeve, a jeweled serpent wraps and entwines itself, holding a heart-shaped ruby from it's mouth, representing the queen's passions (the heart) being controlled by her wisdom (the serpent.)

Looking at examples from the Victoria and Albert Museum's textile collection in London, as well as other British sources, we came to a greater understanding of the sheer magnitude of the embroidery movement during the Elizabethan era.

Other objects which I found interesting that were heavily embroidered were caskets (a type of box... not a coffin), books, and intricate gloves and mittens.  Maybe more on those another time.

After whetting our appetite with amazing image, we got down to stitchwork for the rest of the day.  So many stitches are able to be seen, but historians don't always know exactly how they were done.  There are often more than one way to create the same stitch.  So, we're learning many stitches, but not doing them necessarily in the same way which the were stitched in the past.

We are using authentic materials: wool, linen, and cotton for threads and fabric the most part, although some silk fabric was also used in that era.  I didn't realize that the term "crewel embroidery" means stitching with wool.  Hopefully I'll have a finished sampler or more done by the end of class tomorrow, so I can share some photos!

Monday, December 10, 2012

Elizabethan Embroidery, here I come!

Look at the elaborately detailed embroidery
Preparations all complete, I'm off for two days to the Gail Harker Center for the Creative Arts to learn all about and practice Elizabethan Embroidery.  I've really been looking forward to this, as I do all of the classes at Gail's, partially because so much of my work is done by machine that it's nice to slow down and have the relaxing experience of hand work, and also because I really enjoy history and costume.

My love of costume goes way back to my childhood.  Sure, like many little girls I enjoyed playing 'dress-up', but I guess I never really outgrew it! I remember my parents taking us to a medieval faire when I was quite young, and I've continued attending many of them throughout my life.  When I was 14, I had my first job... working for a private seamstress doing alterations and clothing construction.  I tore out and replaced so many jeans zippers with elaborate top-stitching, that I pretty much swore off of garments for some time (and still have somewhat of an aversion to sewing clothing.)  When I started in college, I wanted to be a costume designer.  Unfortunately, I wasn't really ready for college at the time, so went off to work after one semester.

Nikki and I in our historical costume at
Reno Friesian horse show
I did love to dress quite wild, either in vintage clothing or items that could be considered costumes in my early 20's.  Then I started a small business making Rock 'n Roller costumes for bands and fans, which I kept up for a short time.


Through the vagrancy of life, my main chapter of costumery took a hiatus for some time, though I never lost my love of it.  Then I had some fun in reviving this long-lost love of mine, when I had my beautiful Friesian mare and was showing her regularly.  From time-to-time, there were costume classes at the horse shows, so we both got dressed up in Renaissance gear.

My Friesian mare and I in full Renaissance costume 
Now, with my older son being a Viking aficionado and member of the Society for Creative Anachronism (SCA), I get to play at dress-up once again.  There's even a chance that I can do demonstrations of the embroidery I'll be learning at the "Ursulmas" event in January.  I'm so lucky to have two sons who actually like doing things with their Mom!

Well, I'd best be off to bed, as I need to get up early and drive to La Conner for class (about a 75 minute drive from our home.)


Thursday, November 29, 2012

Viking Tunic Completed!

Last night I helped my son Ryan finish up his wool Viking tunic.  This has been a terrific learning experience.  We went together to pick out the fabric (had to be wool for authenticity.)  He made the pattern from historic sources and his measurements.  I taught him how to pre-wash the fabric and straighten the grain, layout and cut the pieces.  I then taught him the basics of using my Bernina sewing machine (winding the bobbin, threading the machine, stitch length, type of stitch, etc.) and then let him go about constructing the garment.  We did one fitting prior to doing the final seaming, where I suggested we insert some gussets under the arms, to give him a more natural range of motion.  When it was constructed but not hemmed, he asked if I could dye it... the color didn't go as well with his under-tunic as he had thought.  We did several samples to get the color where he wanted it (and because I don't have a lot of experience with wool) and then I dyed the whole tunic. 

We were down to the final steps, hemming and adding some authentic hand-woven trim which he had purchased.  I think he really wanted me to do the hemming... but I got out a needle and thread, showed him how to do it, watched for a few stitches, and then let him finish it up.  I did go ahead and topstitch the trim on for him.

What a wonderful way to be able to contribute to him.  First, teaching him the basics of sewing and that he is capable of doing it.  Next, letting him pursue his passion-not just allowing him, but supporting and encouraging him.  Finally, being able to share this time with him... going to his event with him (yes, I'll be in costume too) and letting myself be enlightened about how much this young man of mine really knows about the era and culture with which he is so entranced.

I still need to finish my Viking apron dress tonight, as the "Good Yule" celebration is happening on Saturday.  I'm excited to be doing a Viking embroidery class at the event, particularly after getting to see the Bayeux Tapistry last June.  More on that in the future!