Pages

Showing posts with label paper-piecing. Show all posts

Wednesday, February 20, 2013

New 5 x 7 Challenge Pieces

We have some wonderful additions to the ongoing 5 x 7 Artist Challenge!

Janine, aka Rainbow Hare Quilts, of East Sussex UK: 

Fused Fabric Valentine by Janine
Janine has a wonderful post on her Rainbow Hare blog called "Do You Ever Get Quilter's Block?"    Not only does she describe making this wonderful fused fabric Valentine, she also links up to a Ted Talk by Elizabeth Gilbert, the author of "Eat, Pray, Love."  What a wonderful opportunity to hear someone who has made such a success in her creative life struggle with many of the same challenges we all do.  Thank-you, Janine, for sharing both your 5 x 7 pieces and Elizabeth Gilbert's exposé on creative genius.
Detail of Rainbow Hare's Fused Fabric Valentine

Janine discusses her process for the little house piece to the left in her blog post "Not What I Meant At All".  I think it's really helpful to hear how people start and what they go through to get to a finished result.


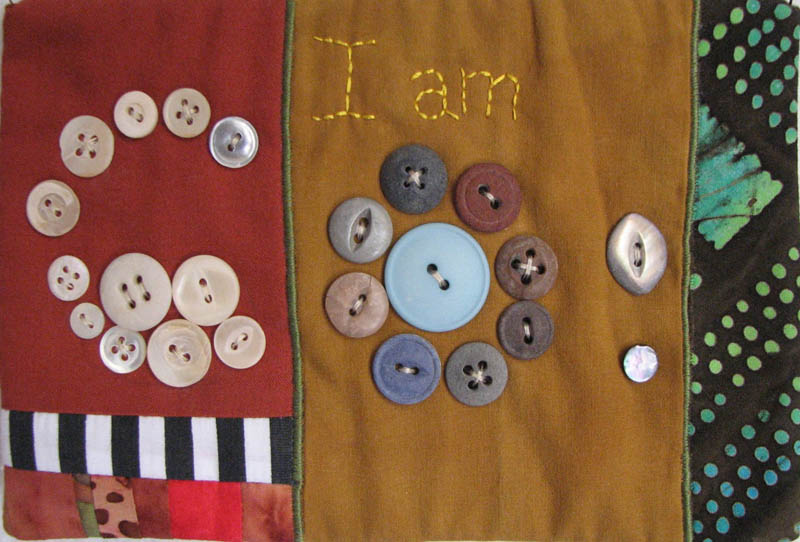
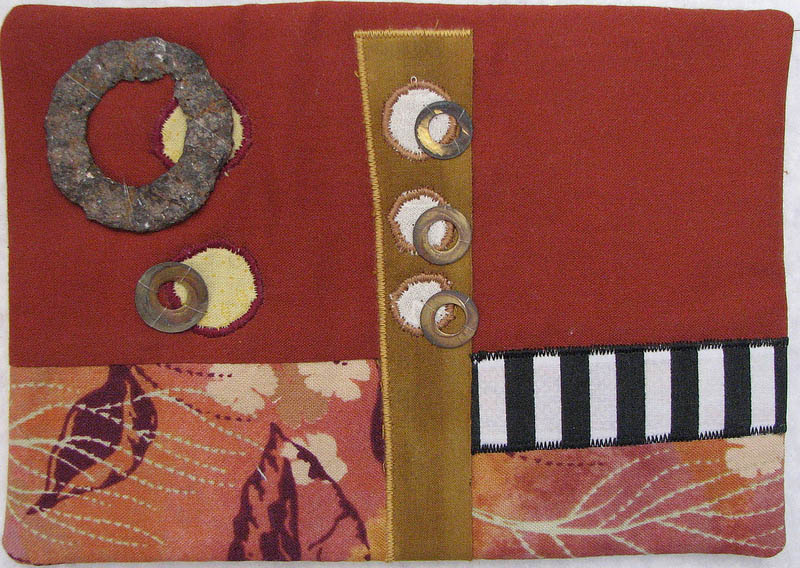
Next, Hilda of Hilda's Hideout is working with found objects.  Here are two of her newest pieces- I see a series in the making!


Lise, aka French Canadian 23, has been working with trees for her 5 x 7 pieces:


Lise describes her process for making Birch Trees... I love how the paper-pieced background is so muted but totally gives you the sense of the tree branches, as well as the graphic fabrics which work well for different bark!

Oak Tree in Fall by Lise- FrenchCanadian23
Although not yet complete, Lise has her second tree quilt well under way.  I'm looking forward to seeing it when she finishes the thread painting that she's planning.


You Might Also Be Interested In:

Developing the 
Creative Habit
5 x 7 Artist 
Challenge
Cilantro - Si!

Tuesday, January 15, 2013

Week 2 of the 5 x 7 Artist Challenge

This week I've completed this windmill design for the 5 x 7 Challenge. As I mentioned previously, I haven't done a lot of paper-piecing before, but it seemed like the perfect technique for the background color splashes which I wanted.
Week 2 completed piece for the 5 x 7 Challenge
Designed and made by Christina Fairley Erickson
Original hand-drawn design
Back side
I ended up change quite a few things from my original hand-drawn design. First, I had small triangles around the center circle of the windmill, which I decided would simply be too small to be done effectively for the size of the finished piece. As I was going through my fabrics for the yellow color section, I found one with the circular motif which I decided would work well as the center, and chose to hand-appliqué it on. The other major change is that I didn't add any struts to the windmill blades. I was going to machine appliqué some red fabric, but it looked too heavy. I then thought I'd machine quilt lines in, but once I finished quilting the colored background areas, the result was that the "windmill blades" and center stand or puff out since they haven't been stitched. I like the look this way and think the result of stitching in strut lines may ruin this effect.  The other obvious change is that I decided to change the placement of the colors.


Sample/tester I made of Leah Day's freemotion
quilting design "Sharp Angled Maze"
I tested out a freemotion quilting design which I thought would work well for my background colors which I found from Leah Day's Freemotion Quilting Project which she calls "Sharp Angled Maze."  Overall, I think the design worked well within my piece.  The one problem that you can catch glimpses of is that with using a different color of thread on the back side of the piece, you can occasionally see bits of the bobbin thread on the front.  In the practice piece, you can see this in the lower half (particularly lower right), but I was able to adjust my machine tension to get rid of the problem.  I'm not sure whether it was the additional thicknesses of the seam allowances, but even with my top tension adjusted all the way down as far as it goes, I still had a little bit of bobbin thread showing.  If I were doing this for a large piece for competition, I'd probably work with it more.  Perhaps a smaller needle size?  Different thread?  Tighten the bobbin tension?

The other criticism I would have of this piece is that when you are further away from it, the blue and purple sections are a bit too close in value to the black/red/orange/yellow windmill blades.  If I were to do it on a larger scale, I would want to add more light values into those sections.

I welcome your comments and critiques on my pieces!

Thanks to other participants this week in our challenge!  Here are what others are working on:

"Wet" -  Hand-painted, thread-sketched and discharged
with bleach pen by Carol
Carol "LandscapeLady" has created this wonderful piece entitled "Wet".
Check out her blog to see her photos of working on this piece throughout the process from photo to completed 5 x 7 art piece.

I really love the movement in the piece... you can feel, as well as see, the drops of water being joyfully shaken off this dog!


"Indonesian Dancer" - Work in Progress by Lise
Lise has this work in progress called "Indonesian Dancer."  She is planning to add more to it, so we'll look forward to seeing more- next week?   The repetition in this piece: wavy lines, musical notes, headdress elements, and sets of eyes all building the theme.  The wavy lines and lines surrounding the face particularly add to the primitive, ethnic feeling.  I can't wait to see it finished!


Other blogs to check out:
Work in Progress Wednesdays at Freshly Pieced - delightful modern quilts

Wow Us Wednesdays at Savvy Southern Style... there are some really amazing projects here!

A Lovely Year of Finishes from Sew Bittersweet Designs has a great monthly goal-setting and project-finishing challenge

You might also be interested in:

Week 1 of the 5 x 7 
Artist Challenge
Getting Started May be 
the Hardest Part
52 Week 5 x 7 Challenge 
to Readers


Wednesday, January 9, 2013

Current Works in Progress

Original sketched design
New week, new project. Well, actually one completely new, one just finished, and another in process. First, I started my next 5 x 7 Challenge piece, which I had sketched out last week.

Paper-piecing pattern
In thinking about how I could most effectively make this, I decided that paper-piecing would probably be the quickest with a nicely finished result. Since most of my art isn't geometric, I haven't had a lot of practice with paper-piecing.  


First section completed
This is where those of you who are familiar at this skill will probably laugh.  When you look at my pattern to the left, I have had to build each section with numbering.  However, I'm having to build parts of the sections on separate papers and then combine them, as my lines don't all match up.  It's seeming to work however.

"Opening" by Christina Fairley Erickson
100% Freehand Machine embroidered and Freemotion Quilted

I also just completed my first piece for the Fiber Funsters 10 x 16 challenge. Guess I'm all about the challenges this year! finishing off this dense freehand machine embroidery was more difficult than I expected. I decided to do a trap unto effect with a second layer of batting inside the lily, to have it stand out from the background. I then added the backing and freemotion quilted around the flower and in uneven horizontal lines over the blue background. Of course, I realized after doing a good portion that I could have just as well quilted from the back side since the flower was already outline, which would have made it possible to have even spacing of the lines. As it turned out, I couldn't distinguish my quilting lines from all the thread of the background, which makes it a little less precise when you view from the back side.

"Opening" back - faced and freemotion quilted
See the white
on the edge?
The real difficulty came when I faced the piece and tried to turn the facing to the back. With such dense stitching, it was remarkably stiff and didn't want to gracefully bend and hide the facing. Also, the process stressed it a bit and little bits of the white under-fabric were showing through.


The edge after painting
with fabric markers
See the difference/?
Well, I steamed and starched and pulled and cajoled, stay-stitched the seam allowance to the facing, and cut away as much of the seam allowance as possible.  I hand stitched the facing down, but still wasn't fully satisfied with the result.  In the end, I dug out some fabric markers and 'painted' the edges and little white spots that shouldn't be showing!  I think it did the trick!


My final piece to share is the second quilt for Fiber Funsters.  The word we're using this time is "Celebrate!" as our theme.  I'm not sure what I think of this piece yet or if it has any promise.  I played around with some fabrics I'd hand-dyed and painted and this is how far I've gotten.  I don't really know how I'm going to free-motion quilt it yet... But it's supposed to be done in a week, so that gives me a little motivation!
"Celebration" - work in progress by Christina Fairley Erickson

You might also be interested in:
52 Weeks of Art The Fiber Funster's 
10 x 16 Group Challenge
2013 Open 5 x 7 Challenge


Blogs You Should Check Out!
For Fantastic Tutorials on FreeMotion Quilting go to The FreeMotion Quilting Project
Work in Progress Wednesday (Thanks Freshly Pieced!),
Link it Up Thursday  (Thanks Seven Alive!) and
 Can I Have a Whoop Whoop (Thanks, Confessions of a Fabric Addict!)
Off the Wall (Thanks Nina Marie Sayre)
TGIFF (Thanks Diane - FromBlankPages!)